
Saturday, February 27, 2010

Post Tsunami afternoon


Well, Hawaii "dodged the bullet" and we are all relieved that the tsunami generated by the horrific earthquake in Chile turned into nothing more than a few small waves that washed over our reefs. It was a good lesson in preparedness and we're thankful that today wasn't a regular work/school day or it surely would have been chaotic.


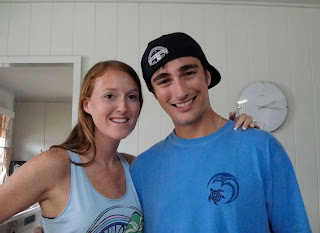
Here's our two guests, Alex and Alex--how cute is that?--who had to evacuate their Waikiki hotel and spent half the day with us, 700 feet above sea level.

I did not let them start stamping and embossing, but the male Alex was intrigued by my finished cards and I gave them one to take home, all the way to New Jersey!

They were the perfect guests--chatty, yet polite--and I'm glad we were able to calm their parents' fears that they were in a safe environment.

My heartfelt thanks for your concern and your emails, too! We are safe and all is good.

Tsunami Day


Just a short post to thank you for your concern regarding the tsunami that will arrive in a few hours. I live in a higher elevation and we won't be evacuating.

We are currently hosting two people who were stranded in Waikiki and leave this evening for New Jersey. Hopefully, they'll be able to leave as scheduled.

I hope my local blogging friends are safe....Praying for everyone's safety.

ATS Wednesday challenge


The Wednesday challenge at All That Scraps is to use some type of text, either newsprint or from a book, and incorporate it into your card. I used some text papers from Jenni Bowlin and made a ruffled flower and punched out some butterflies, too.


This card turned out so different from what I first imagined. I was going for a sepia toned look and colored Darby and Bumbles with just two Copic colors. The card started to look too plain so I added some pinks and browns and then it took a vintage turn.


I didn't put a sentiment on the card because the text circle looks rather busy. This isn't exactly what I envisioned but I like the "fairy tale" feel to it.


Stamps: Sweet November Darby & Bumbles
Paper: Jenni Bowlin, DCWV Vintage, corrugated paper
Cardstock: Papertrey Ink
Ink: Memento Brown; Antique Linen, Tea Dye Distress inks
Other: Copic makers (E51 and E53), Nestabilities, Marvy scallop punch,
Sizzlits leaf die, Martha Stewart butterflies punch, pearls, buttons, pop dots


And I want to share what my mail carrier delivered today--new Distress inks! I just bought five for now and I think Wild Honey will be my favorite new color. Yay for new toys!


Thursday, February 25, 2010

TE Dragonfly card drive


Followers of Taylored Expressions are familiar with the Dragonfly card drive. Check out the details here and see how you can make a difference by sharing some dragonfly cards and be eligible to win a $50 gift certificate, too.


Here's a card that I'll be sending in for the card drive. I made these beaded dragonflies over 10 years ago and I'm glad that they'll finally be used on some cards.


Stamps: Stampin Up quotation
Ink: Peeled Paint, Broken China distress inks; Versafine Onyx Black
Cardstock: Papertrey Ink
Other: Nestabilities, wire, beads, gemstones, pop dots, ribbon

Wednesday, February 24, 2010

Don't worry...bee happy


Here's my second card made with Darby and Bumbles. And I kept the flower that Darby is carrying intact this time.

I forgot to mention that this set comes in digi form, too. You can find it here at All That Scraps, along with Amy's other Sweet November images.

I was pleasantly surprised to find the deckle edge Nestabilities in my "goodies that I forgot about" box and used it as the base for the card. The sentiment was computer generated.

Hope you're having a great Wednesday!


Stamps: Sweet November Darby & Bumbles
Font: American Typewriter
Cardstock: Papertrey Ink white and olive
Ink: Memento; Versafne; Scattered Straw Distress ink
Other: Nestabilities, Sizzix embossing folder, Copic markers, ribbon, button, twine, pop dots

Tuesday, February 23, 2010

Darby and Bumbles


Here's one of Amy Young's newest Sweet November designs--Darby and Bumbles. Darby is one cute elf but Bumbles had me at "hello". He's the sweetest bee, ever!


I'm hoping that Amy designs more impish elves and sprites. I just love Darby's sweet face and expression.


This stamp set was given to me by my dear friend Kiara. I hope she got a set for herself because they make for a cheery card! Thank you so much, Kiara! Love this set and I'll be making more cards with them...

Stamps: Sweet November Darby & Bumbles, Hero Arts sentiment
Cardstock: Papertrey Ink, Stampin Up
Ink: Versamark
Patterned paper: Basic Grey, Making Memories
Other: Copics, Nestabilities circle die, white embossing powder,
Martha Stewart butterfly punch, paper flowers,
Stickles, Inkssentials white pigment pen, buttons, pop dots

Saturday, February 20, 2010

Bring on the cupcake!


Just a short post to share a card that I created for Hero Arts' month long challenge using ribbon. I used a cupcake cling stamp that Kelly gave me--thanks, Kelly!-- and traced the image onto felt.

I embellished with beads, some stitching, and I was so excited to find Hero Arts' sequins which I thought were long discontinued. The flower on the top was made with an 8" length of ribbon, stitched to form a circle and gathered to resemble a frosting flower.

Hope you're having a great weekend!

Stamps: Hero Arts Large Cupcake, sentiment
Cardstock: Gina K cream, Bazzill
Ink: Colorbox
Other: Felt, floss, sequins, beads, pearls

Thursday, February 18, 2010

Happy Bugg and a Tooth Fairy


Here are two cards made with Happy Bugg, one of the newer designs in Christy Croll's Tiddly Inks Etsy store. I printed out a small Bugg and made an easel card with a sentiment from Hero Arts.


The second Bugg is a little larger and I used another dotty background and Hero Arts' alphabet stamps for the sentiment. I also added some Stickles to the top of her cupcake.


And here's Faye, the Tooth Fairy, created by Christy for her daughter when she lost her first tooth. I made a simple card with a slot large enough to accommodate a quarter
...or folded currency.


Stamps: Tiddly Inks digital stamps, Hero Arts
Cardstock: Papertrey Ink
Patterned paper: Basic Grey
Ink: Versamark, Distress inks
Other: Nestabilities dies, Copic markers, clear and white embossing powder,
Stickles, gemstones, pearls, ribbon, pop dots

Tuesday, February 16, 2010

The Cheekies are here!


The Greeting Farm released their Cherry Cheeky Collection and I just received my set from Tamiko's! Love their sassy cuteness--a little "naughty but nice."

This is Cheeky Rockabilly--my fave--and I made my card with inspiration from Mercy Kerin, a former TGF gardener. I loved this card that she made with circles and distressing. I was even inspired to try paper piercing! I'm also planning to enter this card in Lucy's polka dot challenge.


Stamps: The Greeting Farm, My Sentiments Exactly, Hero Arts Dots
Ink: Tea Dye, Black Soot distress ink; StazOn Black; Versamark
Cardstock: Papertrey Ink white; Basic Grey kraft
Patterned paper: Fancy Pants
Other: Copic markers, Nestabilities dies, clear embossing powder,
piercing tool, ribbon, stapler, pop dots, paper rose

Monday, February 15, 2010

Shaped cards and a winner


Because I struggle with card sketches, I like using Nestabilities dies to make quick cards. A few people have asked how they're constructed so this is a quick post to share how I make them.


Basically, you score the back Nestabilities shape about 1/2" down from the top, fold and attach to the front. For the Labels One die, I like to score about 3/8" to 1/2" from the top.


When using the circle scallop Nestabilities die, you have to count and score 4 or 6 scallops because there are an even number of scallops (22) and the card has to be able to stand on 2 scallops for viewing.


For the Nestabilities blossom die--which makes cute little cards--there are an odd number of scallops, so in order to make it stand, you have to score midway between three scallops in the back.


In the past, I've used a tape runner to attach the pieces together, but now I prefer a double stick tape.


I attach it to both sides of the card and it insures the card won't come apart with extra handling. It also helps to write your message inside the card before you attach the front and back pieces.

Hope this helps (Charlotte!) and here's a quick video by Lucy which shows how to make a card using the Labels One die.

***

WINNER--WINNER--WINNER

Using random.org, the winner of Jane's Bird Watching digi set is Suzanne C. Email me and the digis will be sent to you by Jane herself. Looking forward to seeing what you create with the digis!